

Learn how to promote the products from your Bonfire Campaign with these photography tips.
Now that you’ve created your t-shirt design, it’s time to get ready to promote your campaign. Whether you’re promoting your campaign on Instagram, Facebook, or in an email newsletter, you’ll need compelling images of your shirt to help push people to buy your apparel.
We recommend ordering a few shirts before launching your campaign so you can photograph your shirts. These real-life images consistently out-perform screenshots pulled from our site, so it’s worth adding a little time to your campaign timeline. And with Bonfire, you can order as few as 1 of your shirts at wholesale cost. And remember, if you are selling a range of apparel types, it may be a good idea to order a few different products, such as a t-shirt and sweatshirt, to show off a broader picture of your offerings.
Now that you have a few of your products in hand, it’s time to take some pics. As you’re planning your photoshoot and creating a list of images you want to capture, take these tips into account.
Natural Light is Magical
Photographing outside or in a room filled with natural light is the easiest way to ensure you’ll end up with quality photos. Even if all you have to work with is an iPhone camera, photographing in natural light will help you end up with great photos. If you enjoy photos with harsh shadows and bright contrast, try photographing in the bright sun of mid-day. If you want a more even-toned, warm look, plan your photo shoot for an overcast day, or shoot during twilight hours at the beginning or end of the day.
Set the Stage
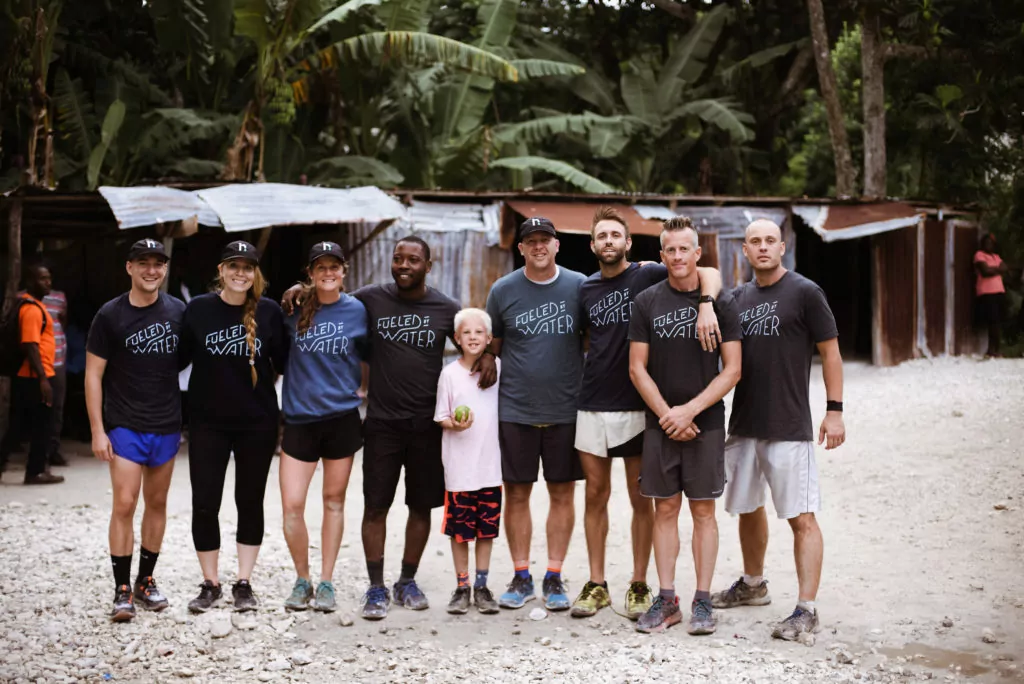
Pay attention to the setting you plan to take photos in, or props you use in the photoshoot. This is an easy way to take your promo images to the next level. If your shirt or campaign has a specific story to them, or theme, think of ways you can play that up with the location you choose. For example, if your shirt campaign is a fundraiser for a local animal shelter, take photos in the shelter with the dogs and cats you are working to raise money for. Or, if your campaign is celebrating literacy and reading, take photos in a local bookstore or use books as props in the image.
Vary the Content
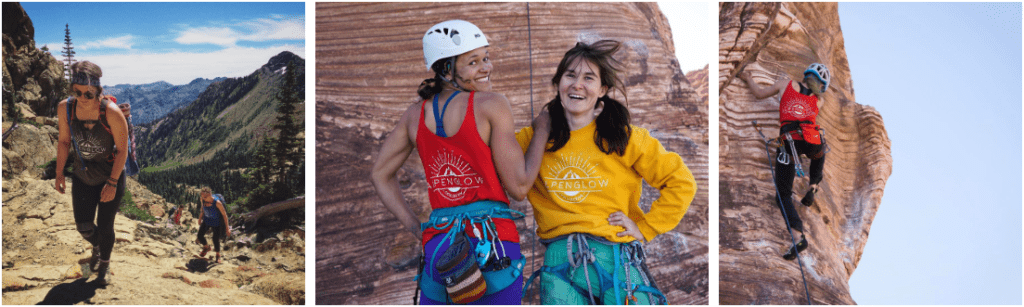
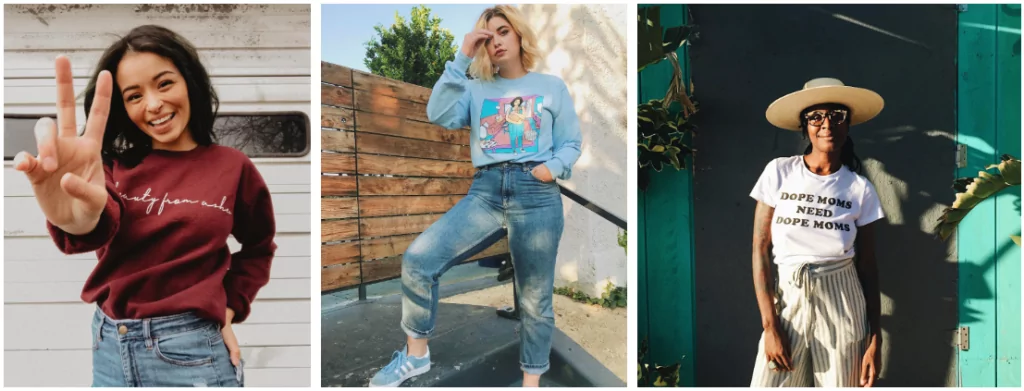
To ensure you don’t bore your community with the same promotional photo in post after post, create a varied portfolio of promotional images to use. This will help keep your promo posts feeling fresh. Take photos of more than just one product you are selling, to show the fuller range of the items your buyers can choose from. You can also create more variety by taking photos of your products modeled by more than one person. Alternate between one person, and group shots.
Make the Design Visible
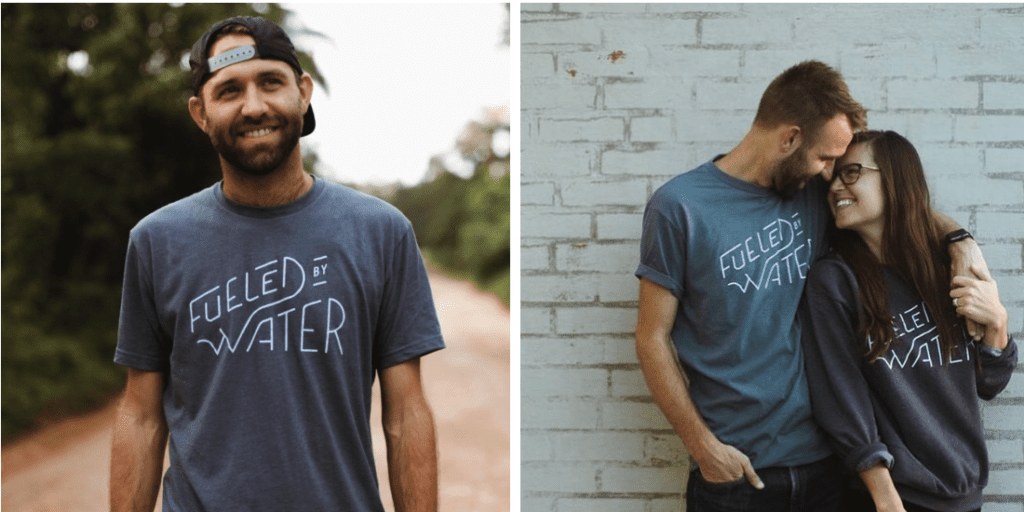
This may seem obvious, but make sure the design on the apparel you are promoting is visible in the photos you take. This is especially important when the design relies heavily on words to communicate its message. If parts of the words in your design are hidden behind hair or a cardigan, people won’t be able to see what they are buying, and you’ll be answering the question, “What does it say?” over and over again.
All About the Angle

Another way you can create a more robust portfolio of promotional images for your merchandise is by switching up the angles you are shooting in and thinking creatively about poses. While it’s nice to have some images with a person standing straight on toward the camera, it’ll also get old. Think of creative ways your models can pose to give your photos a more lifestyle feel. And remember, your model doesn’t always have to look at the camera.
Zoom in on the Details
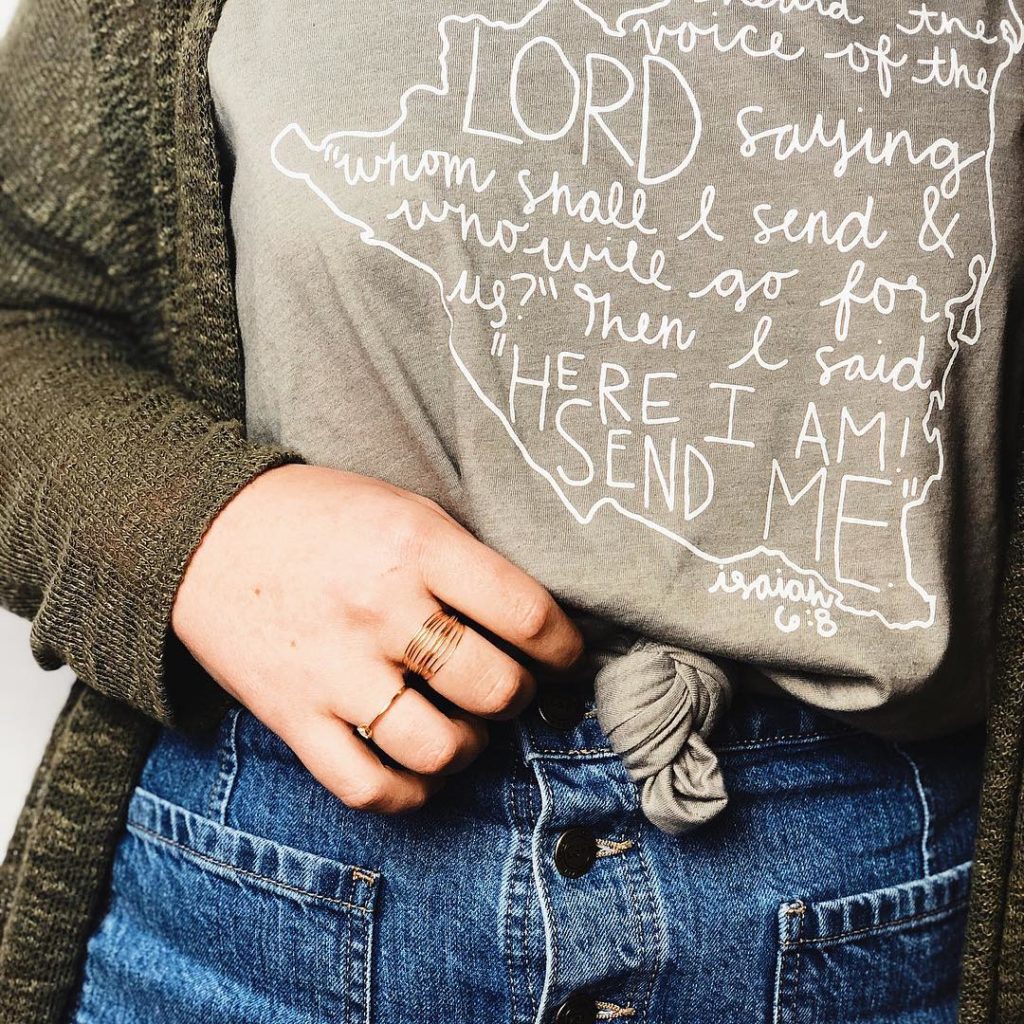
While we believe it’s incredibly important to have photos of people in their shirts, we also see the value in having up-close photos of your design to show off the artwork. This is especially important if the design itself is delicate or detailed, or if there is very small text that may not be readable in your other photos. Lay the shirt on a flat surface in a room with bright natural light, and zoom in close to the design. You can also surround your shirt with props that point to the cause behind your shirt design, or thoughtfully choose an on-brand background to photograph on.
Show Your Design Process
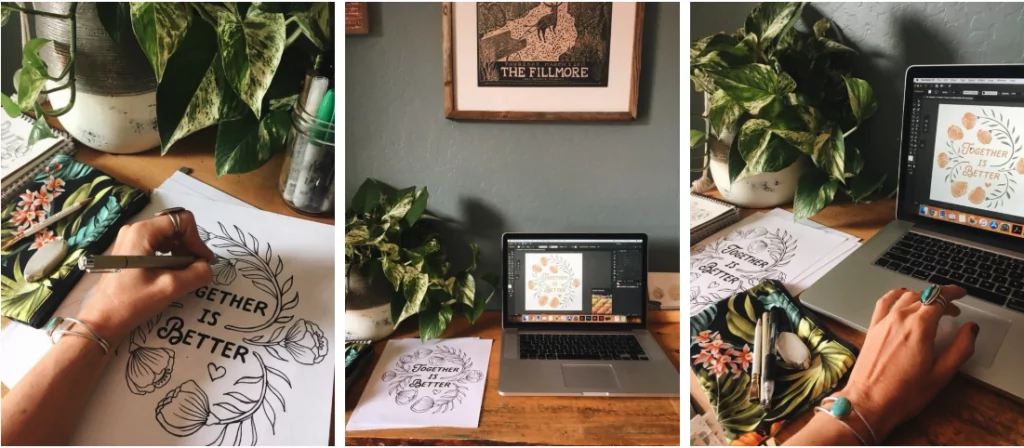
If you have sketches that show the creative process that led to the design featured on your merchandise, take some photos of your sketchbook in your design space. Your community will enjoy getting to see how the design they purchased came to be.
Edit Your Photos Thoughtfully
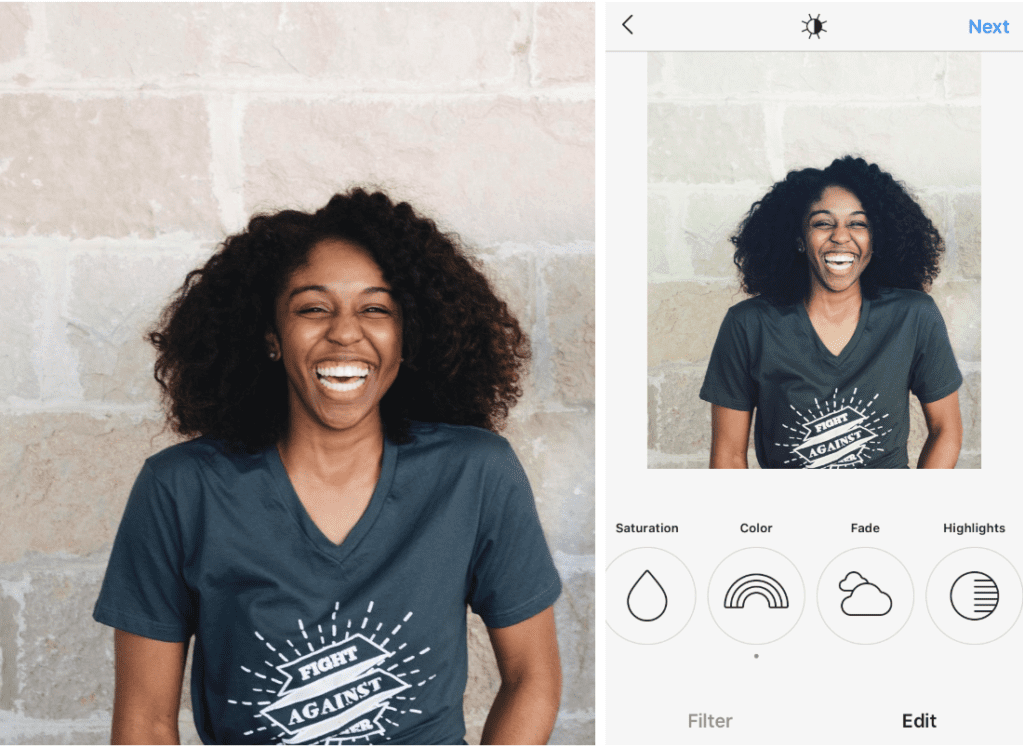
While you may feel tempted to throw your photos on Instagram with Gingham or Clarendon, we recommend sticking to more premium editing tools. If you do want to edit the coloration of your photos, we suggest checking out VSCO, or editing manually in Photoshop or Lightroom. But, be careful not to misrepresent the colors of your products by overmanipulating your photos with color filters. If you over-edit the colors in your photo, your buyers might be upset when their actual product arrives looking differently than your promotional images.
If you’re still unsure of how to take promotional images that will look awesome and help you sell more shirts, follow Bonfire on Instagram. Our feed is filled with the best promotional images taken by the community of Bonfire sellers.
As you promote your Bonfire campaign, remember to tag us or use #wearbonfire to be featured on our Instagram feed.


